Forgot to post this earlier in January...

Well I think I forgot to post these earlier in the month... these are the thank you cards that I made for the children to give to all their friends and family for the Christmas Presents and Gifts of Money they received at Christmastime. I still think it is very important for children to show their thanks on these occasions. I also send out thank you cards for anything nice that is done for me... I just think it is a nice touch and an excuse to make more cards.... lol


I thought I would pick something simple and quick to do, although at the end of the day they weren't very fast. I used Kraft Cardstock and stamped the card blanks using the big Polka Dot Stamp from Stampin' Up! in Whisper White Kraft Ink. I cut out some Not Quite Navy Cardstock, some So Saffron Patterned Paper and stuck them together rounding one edge... the ribbon and buttons are from Papertrey Ink, and the sentiment is from the Pocket Silhouettes Stamp Set also from Stampin' Up! Finished it off by rounding the corners of the card blank... simple but effective.


Here is a close up of the card, I also inked around the edges using the Not Quite Navy ink....
Have a great day, take care all xx

Linda Lloyd signature logo

Simon Says Challenge

I was looking around for some challenges and I came across this one... make anything BABY... well I dont know anyone who is having a baby but it caught my imagination and I decided to make these cute baby shoes out of paper....

I used Not Quite Navy, Bashful Blue and Whisper White Cardstock to made the band around the box and the Animal Stories Stamp set... isn't it a cute little owl?

The little shoes were made out of Bashful Blue Patterned Paper with Bashful Blue Cardstock for the base and Whisper White Cardstock for the front, the ribbon is also Stampin' Up! Blue and White Gingham. I used Not Quite Navy to line the base of the box. The box was made out of Stampin' Up! window sheets.

And above is the finished project all wrapped up nicely in its box... forgot to mention the dots around the owl image is from the Stamp Set Circle Circus... now just need to find someone to give them too.... lol

You can find the Simon Says Challenge here .
Dont forget to check out my video tutorial just below here for A Rose is A Rose card.... have a great weekend all xx


Linda Lloyd signature logo

A Rose is a Rose Card Video Tutorial and Cute Card Thursday Challenge

As I was making so many of these A Rose is a Rose cards I thought I would show you how to do an easel one on a video tutorial. I haven't really mentioned any sizes in the video as it can get very confusing... just bear in mind that the cardstock was cut using a half of an A4 sheet lengthways and then folded in half, so all the sizes after that are slightly smaller that a C6 size card, graduating down depending on how many layers on that particular section...


I also decided to make this card for a challenge over at Cute Card Thursday. You needed to make a card featuring flowers and here is my card, with roses on...

The ingredients list is shown throughout the video, so sit down with a cup of coffee and a notepad if you want to copy it.... I was thinking how suitable this would be for Mother's Day too...


Hope you enjoyed it folk, check back later as I have another Challenge to enter and will be posting my finished item here.... have a great day xx

Linda Lloyd signature logo

Mojo Monday Challenge Cards...

Well I was so excited that I had got my A Rose is a Rose Stamp Set out again that I did loads of images to use on cards so thought that I could use this image for the Mojo Monday Challenge. But this week you could pick between a round card and a square card. Me being me couldn't pick so made one of each...

And here they are......

And a close up of each one... I am just loving this stamp set....

For this card I used Pink Flamingo Patterned paper, Pretty in Pink, Rose Red and Whisper White Cardstock. Rose Red with White Stitching Grosgrain Ribbon, Scallop Oval, Oval and Scallop Border Punches, and the Rose Red Cardstock I stamped using versamark and the rose from the A Rose is a Rose stamp set. The sentiment is from the Happy Moments Saleabration Set. Oh yes, the buttons are also from Stampin' Up! and tied through with Pink and White Gingham Ribbon and the Gold Elastic Cord.


I cut this card blank using the largest Scallop Circle Nestie, then used Patterned Paper from the Rose Red collection, Pink and White Gingham Ribbon, Pretty in Pink and Chocolate Chip Cardstock. Word Window Punch and sentiment from Happy Moments Saleabration Set. The Happy Moments set is so popular at the moment it has sold out in US, if you would like to get your hands on a set all you need to do is spend £45 or more in the current SU brochure and you can pick the set for free.... as a special offer I will ship your order to you free of charge if you order through me before the end of February. Contact me with your order at LindaLloyd@gmx.net.
Thats all for now folks, I am working hard and have loads to show you over the next few days, and look out for my video tutorial which will be up and running either later today or tomorrow...
Have a great day all xx


Linda Lloyd signature logo

February Card Classes

I thought I would post some piccies of my February Card Classes. Not sure that anyone who comes actually visits my blog. In reality I would have had a Valentine's Class with Love You Much, but no one who was coming actually wanted the valentines class and I had a request for this stamp set, so thought I would do Valentiney colours using this stamp set and there is Monica's little treat pouch incase they want to give something to that special someone. DH is working from home this week and has just watched me making and photographing this treat pouch so I guess giving it to him for Valentines is out of the question... (he also reads my blog posts so I will know he has read it when he laughs later)....


We will be making 3 cards and a treat pouch using the A Rose is a Rose Stamp Set, the Saleabration Happy Moments Stamp Set for the Happy Birthday Sentiment and the sanded large stamp for the background on one of the cards. The colours used are Rose Red, Pretty in Pink, Old Olive and Always Artichoke Inkpads, plus the Chocolate Chip inkpad for the sentiments. The Patterned Paper is from the Old Olive and Rose Red Packs.


I also used the leaf/tree stamp from the Good Neighbours Saleabration Stamp Set, I love this little stamp for stamping backgrounds and edging pages. I never noticed before but the Word Window Punch fits nicely across the Scallop Circle Punch.


I used the sentiment from the A Rose is a Rose Stamp Set for the above card, but coloured just the first 2 words in using the Chocolate Chip Stampin' Write Marker Pen.


How cute is this little treat pouch filled with mint imperials. Thanks Monica for showing us a tutorial of how to make it.


The background for this card was stamped using the Sanded Stamp Set, I left the stamp image upwards on the desk, inked it up and then put the cardstock over the stamp and rubbed it down well, I ended up with a nice crisp image. The word window is punched out of the layers on this card and the layers are raised up using Stampin' Dimensionals and the Happy Birthday sentiment is below it if you see what I mean so that it really is a window.

Hope you like it, hope my ladies will like it too.... take care everyone and have a great day xx


Linda Lloyd signature logo

A Little Thank You Card.

I really need to make myself some little thank you cards as I seem to need them on lots of occasions and have to make them at the time, the ideal would be to have a box of cards all ready for any occasion... maybe this will be my plan for the week...


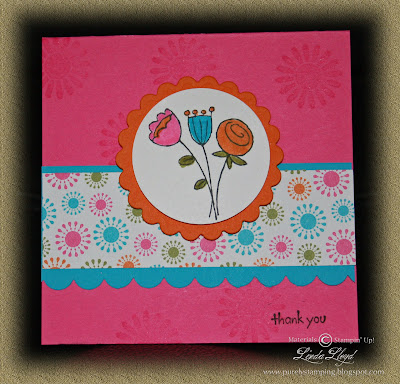
Here is a little thank you card I made quickly, in fact I made 2 of them as I needed them for some ladies who placed Stampin' Up! orders with me... aren't these colours lovely and bright, think everyone needs a bit of cheering up with the grey days we have been having recently.

Have been really busy today planning next months Card Classes, the cards I have made are lush, even if I do say so myself, just one 3d item to make and it will be complete, so after my little boy's assembly tomorrow I will be finishing the class.

I had some excellent news yesterday, I received an email from a local shop telling me I had won their Christmas Draw which was £100 of vouchers to spend in their clothes shop... woohoo, went in today to collect the vouchers and to check that it was really true and not someone having a laugh with me and it was.... I could probably have spent the vouchers there and then, luckily my ticket was running out in the car park and I had to get back to the car... want to take my time picking what I want, they last a year so dont have to buy everything now...... (says she who hates waiting for anything).... lol

Have a great evening all, will be back tomorrow, dont forget to take part in my fortnightly colour challenge, the link is on the left hand side column, just click on it and it will take you to the post. There will be a small prize for the winner.

Take care xx

Linda Lloyd signature logo

A Little Bag....

Whilst at training last Saturday we made a little bag which would hold love notes or something small like that. Well I finished my little bag off at home but decided to add a little notebook to it.


The notebook has quite a few pages and was made using normal white paper and making a cover to match the little bag.

It ties up nicely using the Linen Thread. The Cardstock used is Sage Shadow, Elegant Eggplant and Pale Plum. the stamp set that I used to stamp on the bag is the Saleabration Set Vintage Tags. The little clip used to attach the label is from the Clips Set from Stampin' Up! and the ribbon is the new Whisper White Satin Ribbon and you get tons on a roll.

Below shows you just how well it fits into the little bag, The perfect little gift for a friend or just to show someone you care.


Off to weightwatchers this evening, just need to shift the extra weight I put on at Christmas... dont want to put the 5 stone back on that I lost last year, so have to keep myself in check. Not sure I have lost anything this week, but we shall see....
Have a great evening all xx


Linda Lloyd signature logo

In Love With Stamping Saleabration Blog Hop...

Welcome to our In Love With Stamping Blog Hop... there are 30 of us taking part so we have split it into 2 blog hops 15 in each. Each project will use something out of the Stampin' Up! Saleabration Set and we hope this gives you some inspiration so you can design your own goodies with the stamp sets. If you have reached me that means you have come from Jan's blog here (hopefully) if not please make sure you go back and visit Jan's blog and her wonderful designs.

To get these sets you just need to spend £45 in the current Stampin' Up! catalogue and pick one of the sets free... if you would like to place an order with me just contact me on LindaLloyd@gmx.net.


I decided to be a bit more adventurous with these designs and made a suitcase out of Sahara Sand, Close to Cocoa, Really Rust and Chocolate Chip Cardstock using the Spiced Cider Patterned Paper. The Stamp Set I used for this set is the Good Neighbours set and it is stamped using Really Rust, Close to Cocoa, Old Olive and Bashful Blue Ink. The above photo shows the whole set including the suitcase.


The above photograph shows all the cards packed into the case, it has room for 2 different size cards, some decorated paperclips and pens and pencils.


This is a close up of the inside of the case, you can see in this picture that there are dividers in the box made out of Whisper White Cardstock... this would make a brilliant gift for a friend who was moving, although I didn't put any sentiments on the cards so they can be used for any occasion.


The small cards are 3 x 3 in size, the paperclips have been decorated using the Vintage Tags Saleabration Stamp Set and embossed. The back of the paperclips that you cannot see has the leaf shaped tree stamped onto the Scallop Circles.


The big cards are 4 1/2" x 5 1/2". The little houses fit nicely onto a 1 3/8" punched out circle which can then be matted onto the Scallop Circle.

I then moved on to making a little box set which would make a lovely gift for a friend. I used Real Red, Rose Red, Whisper White and Regal Rose Cardstock. The Stamp Sets I used are Happy Moments and Whimsical Words. The Patterned Paper is from the Kaleidoscope Set and the Pink Flamingo Set.

You cannot see very well, but the box is covered in a Medium Window Sheet which Stampin' Up! sell. I used Gold Cord to wrap around the box and Regal Rose Ribbon to decorate it.


These are the cards I made, they measure 3 1/2" x 3 1/2" and the chocolates in the middle of the box are Hersheys.


The above photo was taken after I had removed the window sheet cover from the box so you could see everything packed away. I used the pink colours as it is soon Valentines Day, but not everyone wants Valentine Cards so made them so they could be used for various occasions.

Well I hope you enjoyed your stop here. Your next stop is Dawn's blog. I know you will love her contributions to the blog hop..

Have a great Sunday, take care all.. xx


Linda Lloyd signature logo

Two in One Day.... am I sick?

So 2 posts in one day, but there is a reason for that. I have made this card using a Challenge Sketch which finishes tomorrow, you can find it here, so needed to get it posted before then, otherwise I would have made you wait until tomorrow for it.

I wasn't sure at first that I liked this Pink Flamingo Patterned Paper, but I bought it anyway and absolutely love it.... it is truly gorgeous. I also have the Kaleidoscope Patterned Paper and not sure about that either, guess I just need to get it out of the package... watch this space.
So card is made using Pink Flamingo patterned Paper, Cameo Coral, Tempting Turquoise, Real Red and Whisper White Cardstock. The sentiment is computer generated (had a request for New Year cards, but not just your run of the mill Happy New Year stuff, hope this is the kind sentiment that was wanted). The little image is from the Saleabration Set, Good Neighbours. And finished off with Whisper White Taffeta Ribbon and a few gems from my stash... Come on Stampin' Up!, give us a few gems in our mini catalogue when it comes out.
Have a great day xx


Linda Lloyd signature logo

Giraffe Punch Card Video Tutorial + Challenge Entries

I know what you are thinking... twice in one week... good eh!! I was so pleased with my little giraffe punch card that I thought I would show you how it was done. Only problem I have with these video tutorials are they are filmed using my iphone attached to my desk lamp by 2 elastic bands, hence the images are not always central to the frame.... and sometimes are slightly out of frame. I am hoping to get better as I go along... lol


Again I will not be giving you a recipe for this card as it is all mentioned in the video, you just need to jot down what you need. If anyone wants more specific details about what I used, please just email me at LindaLloyd@gmx.net. All these punches are available from Stampin' Up! UK except the one I used for the little antenna stalks, unfortunately we do not sell that punch but I did have one amongst my craft stash which I used.

I am also entering this card for a couple of challenges, one is at Simon Says. The other challenge is at Creative Card Crew and they are both Punch It challenges.

Part 1

Part 2

Hope you enjoyed watching it. I will be trying to do a video tutorial every Wednesday and will be calling it... "Why Not Make It Wednesday"... lol (best I can do, sorry)...

Have a great day, take care xx

Linda Lloyd signature logo

My First Video Tutorial...

Welcome to my first Video Tutorial. I thought I would start with something quite easy but very effective.... a Valentines Card as it is topical at the moment. These only take a few minutes to make and hopefully the video is self explanatory. Excuse my voice I am always being told I sound like a little girl and sometimes when a person rings my house they think I am my daughters... doh

I also want to enter this card for the Papertake Weekly Challenge which is to make a predominantly pink card.

I wont give you the recipe for these cards as if you watch the video, the items used will flash up on the screen. I hope you like it and if you have any comments on how I can improve it then please leave me a comment.


I will also be making a tutorial later to show you how I made my giraffe card that I made for swaps at our training day last Saturday... so keep checking back.

Have a great day all... xx


Linda Lloyd signature logo

Tackle it Tuesday Colour Challenge....#1


I have decided to do a fortnightly Tackle It Tuesday Colour Challenge, I will post some Stampin' Up! colours that I have seen that have inspired me and you can make a card, 3d object, mini album, anything with these colours.... when the fortnight is up, I will pick my favourite card and send out a little prize.... nothing major but just a small thank you for entering my competition. It would be good if we could get a lot of entries, more inspiration for all of us, so if you enter please mention this Challenge on your blog please and possibly a link...


So without more ado here is this weeks colours.


I thought I would make it a bit easy to start with so only 3 colours to play with, my card is shown below.... I think the colours go lovely together..... please enter via Mr Linky at the end of this post.

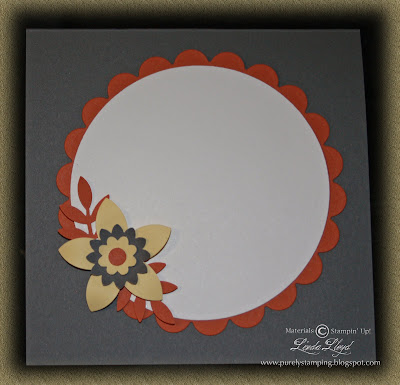
The Patterned Paper used is Nouveau Chic by Stampin Up, and I used the 5 Petal Punch and the Boho Blossoms Punch for the flowers. The sentiment is computer generated.

I look forward to seeing all your entries.... and thanks for playing along.

Linda Lloyd signature logo