Showing posts with label Box. Show all posts

Easter Eggs

Today I had my last card class before Easter and so I made the lovely ladies some little Easter Egg boxes, plus an Easter Card which I forgot to photograph.... Doh!!

I used the new Sweet Pea Paper Stack for the top and bottom of the box, the little stands I put the eggs in were made with Barely Banana cardstock to match the patterned paper and the ribbon and flower on top are Tempting Turquoise. The very yummy eggs are Thorntons....

I also used the new bird punch to punch out the leaves for the flowers on top of the box....
Hope you have a lovely Easter weekend, I have scheduled a post for tomorrow and another one for Easter Monday, so fingers crossed they work...
Take care all xx
Linda Lloyd signature logo

More Sneak Peeks.....

I attended a Stampin' Up! Training Day at Reading last Saturday and my wonderful downline Teri had made me this little box using new stash from the mini catalogue.....


and inside was two bottles of Sanctuary lushiousness which I have had my eye on for a while now and despite hinting didn't get any for Mother's Day or Valentines Day, so was doubly gorgeousness for me..

I just want to say thank you so much to Teri, it was a lovely surprise and it was absolutely brilliant to finally meet you at last...

 For this set Teri used the new Vintage Vogue Stamp Set and the new Very Vintage Wheel which I haven't actually bought yet.... I wasn't sure I wanted it until I saw this gorgeous box, now it is definitely on my wish list. But I do have the Vintage Vogue Stamp Set..... watch this space...
We all took swaps along too, and here is the swap I made...


I used the new Sweet Pea Paper Stack for the Patterned Paper and the little owl is from the Fox and Friends Stamp Set, all from the new catalogue. I used Whisper White, Taken With Teal and Rose Red Cardstock and grosgrain ribbon in More Mustard and Chocolate Chip... the sentiment is from the Trendy Trees stamp set....
Am sorting out some storage in my craft area this weekend, yet again, I really need to organise my stamps better and my nestabilities.... I also have a load of stamps to sell so keep your eye on here if you love Magnolia, KatzelKraft, Sugar Nellie, Autumn Leaves and a few other stamps.... I am also selling a hardly used Scor Pal which I bought but wasn't sure I liked.
Have a great weekend all xx

Linda Lloyd signature logo

Card Class.....

I thought I would show you what we did at my Card Class this month... the ladies all decided last month that they would like to make a masculine card set this month after seeing my card...

But I thought that maybe the flowers were a bit feminine, so I designed a whole new set to make, and I think they all went down really well, everyone seemed pleased and no one found them too difficult.... Here is a photo of the whole set together....

We even made a little Treat Box, I learnt to do this at a day Monica held in Peterborough, I changed the colour etc, but it was not my template.

The colours I used for this was Elegant Eggplant, More Mustard and Always Artichoke... and a small circle of Really Rust.... the Feather image is from the Nature's Nest Stamp Set and the little leaf is from the Autumn Days Stamp Set... the patterned paper is To The Nine's Speciality Paper... the chocolate bar is now all mine.... he he he

This card used Spiced Cider Patterned Paper, Elegant Eggplant and More Mustard Cardstock and the ribbon is Always Artichoke 1/4" Grosgrain. Stamp Set as above... I used the pricking mat and template to make the holes in the cardstock...

Again for this card I used More Mustard and Elegant Eggplant, the patterned paper is To The Nines and the ribbon is 1/4" Elegant Eggplant Grosgrain.

This last card is an easel card, the patterned paper is from the Perfect Plum Patterned Paper set and everything else is as above....
My little grandson who is 23 weeks old was admitted to hospital again last night, this time the doctor seemed positive that he wouldn't be going home until they found out what was wrong, this included having a gastric team on standby at the Royal London Hospital... they observed him last night, did even more blood tests and today decided that maybe he is allergic to dairy products.... er hello, we said this to them 3 months ago.... anyway this meant that I got to have my 22 month old grandson yesterday evening.... what a shame!! ha ha So small grandson is now home, he has kept his last 3 bottles down apart from the normal baby sick and we have our fingers crossed that this is the problem and finally he will start to put on weight.... the doctors have said he will never be able to have dairy products and the baby milk they have given him is only available on prescription, but hopefully for now everything will be fine... thank you everyone who has asked about him.
Hope you all have a great weekend, and Mums that you have a really great Mother's Day.... (ooops still need to make my mum a card...) Take care all xx

Linda Lloyd signature logo

More Pheasant Cards....


I got so carried away whilst making my pheasant tutorial the other week, I stamped out loads of pheasant images, so just had to make more cards, always handy having mens cards and I also put 4 of them in a plastic box with envelopes to give away to someone, the card at the back is the plastic box which is why it looks strange, the flash bounced off of it....

I stamped the card blank with images from the Autumn Days stamp set in versamark ink... I used the Scallop Border Punch for the scallops and various different colours of the Stampin' Up! Patterned Paper.... The Happy Birthday and Thank You sentiments are from the Happy Moments Saleabration Set... I am just loving the Saleabration Sets for the sentiments....

Have a great evening everyone, take care xx


Linda Lloyd signature logo

My Team - The LadyBugs.....

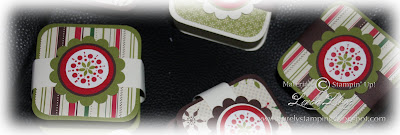
LadyBug mobile phone charm boxes teaser image I have a wonderful team of ladies and I have called us The LadyBugs, if you would like to join my team then please email me at LindaLloyd@gmx.net and I will help you to join with us and let you know all about the wonderful promotion for anyone joining my team during January and February.

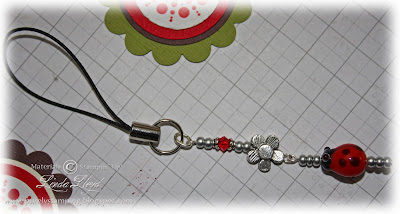
For Christmas this year I wondered what I could get for my wonderful downline and decided that making something for them was the way to go, and that I would make them mobile phone charms with little LadyBugs on.

LadyBug mobile phone charms
LadyBug mobile phone charm closeup I then made some little boxes to put them all in so they would have a safe journey to their new home....

LadyBug boxes And here is a close up of one of the boxes....

LadyBug Box closeup I used all Stampin' Up! stash for the boxes, including the new Christmas Scrappin' Kit, which is still available if you want to scrap some of your photos from Christmas.


I hope all my downline liked their little gifts.... I also sent a Christmas Card alongside the gifts....


Acetate Christmas Card

Hope you all had a great day, take care xx


Linda Lloyd signature logo

A Little Something For Scouts...

My son and daughter go to a local Scout Group and are running a tombola stall at our town Victorian Evenings (2 Thursdays at the beginning of December, all the shop workers dress up in Victorian outfits and there is a horse and carriage which drives along with Queen Victoria and Prince Albert in (obviously not real).... and I thought that if i was to give tins they would be yukky stuff that we dont eat.... lol, isn't that what everyone does, gives the tins that have been in their cupboards the longest? Anyway, I decided to make these card boxes, they have 3 Hershey chocolates in and 2 cards in each side, I thought these were a bit different and might attract peoples attention a bit more than just tins would.... lol


I did use last years Christmas Scrappin' Kit as I was donating it for nothing, I thought I would keep this years kit for something else...

For the top kit I used the retired Ski Slope Papers and Real Red and Old Olive Grosgrain Ribbon and cardstock. The final details for each box is a loop of the Gold Elastic from Stampin' Up. I so love these colours, and I made these boxes without eating any of the Hersheys chocolates, how good am I?! Unfortunately I then made paella for dinner and had 3 small bowls..... oooops, we dont have it very often and it is my totally favourite meal.... lol

I notice we are nearly at the 2000 on my bookworm counter and I will be making the draw once it hits 2000, but I am going out tomorrow afternoon and wont be back until late, so I may have to make the draw on Thursday morning, but dont worry I wont forget as I am so excited about giving away all this lovely stash. I even have the pizza box ready to pack it all in... lol

I will be back tomorrow and tell you all about where I am going tomorrow and I also have a card all ready to post in case I dont have time to make one.... my 6 year son is having his school assembly tomorrow and the parents get to go and watch and see what they have been doing so far this year.... cant wait.

Have a good evening, take care xx


Linda Lloyd signature logo

A Little Something For a Challenge

Right, well I have decided to totally turn around my life and everything I do (not that I have much time after being a mum to 10 children and running them around to various appointments etc), but I need to get on and do something instead of being in front of my computer all the time. I also want to keep all the weight off that I have lost and being more active will do that hopefully. The plan is to also have a bit of a sort out in my craft area and put away stuff not used so often and take out stuff that is used whenever I craft like cardstock.... I also intend to have a major bloghop and find a challenge for each day of the week, which will hopefully inspire me to get things made in advance instead of making cards at the last minute.... lol Which reminds me, must get on and make some halloween gifts....

Anyway, here is my first Christmas Items of the year... and made for the Stamp With Us Challenge, which is a Stampin Up based website run by some brilliant demonstrators whose work I greatly admire. The challenge was to make something that wasn't a card, and since I received my new catalogue stash this week I decided instead of stroking it I would use it... (see I said I was turning my life around, I would normally have stroked it for weeks)...


I made a small box with a flap using the new Stampin Up Simply Scrappin Kit "Christmas Jingle", you get everything you need to make some brilliant scrapbook pages, cards or mini albums and it all co-ordinates including the cardstock, stickers and paper. And inside this little box I made is a mini folding album which I intend to fill with pictures from Christmas this year. A brilliant little gift to give to a loved one this Christmas so that they can save their own memories.... and here is the mini album out of the box...

Not yet filled as I want to put some photos from this year in it, and will make sure I take some really good ones especially for this album as I have never had an album before. It is also a good size to carry around in your handbag so that you can brag about the excellent Christmas you had, or just to remind you of the good times you had once, the cold, snowy, dull new year comes round.... have a good day all. xx


Day 11 - 12 Gifts of Christmas

Well the gifts wouldn't be complete without a small box of

Thank You Cards

So I made 10 3 3/4" x 3 3/4" cards and using the stamp set Pocket Silhouettes I decorated them all differently. I didn't really have room for a sentiment on the outside, so put it on the inside... here are the cards along with the inside of them, plus the envelopes.


Next I needed a box to put them in, and this is how I made it...

I took a 12 x 12 piece of textured card and cut it down so it measured 10 x 10. I then scored it at 3" and 7" in both directions so that I ended up with a piece of card that looked like this...

I then cut along the crease at 3" and at 7" on one side and then the opposite side (not on all sides)... I also cut a slight slither out here and added double sided tape as shown...

Next taking each piece bit by bit I peeled the tape off one corner and bending up the side and tucking it in I securely stuck it to the inside of the longer piece. I did this with all 4 corners so it ended up like this...

And it looked very neat from the side...

The cards fit very nicely in this size box...

We next need to make the lid. For this I used a 12 x 12 piece of Holiday Treasures Patterned Paper (which was the PP I used on the cards, so that everything matches nicely...) and cut it to measure 10 1/4" x 10 1/4". I scored it at 1 1/2", 3", 7 1/4" and 8 3/4". Do this both ways so that it is scored all around.

I then had to cut the corners so the box would fold together properly, so cut along the white lines I have drawn on the next diagram...

Do this on all four corners. When it has been cut out it will look like this...

Put double sided tape along the outer edge on all four sides, if you look carefully at the photo above you will be able to see where I stuck it. You will also need to cut downwards to the next score line on opposite sides, from below where the tape is. You fold the corners in and tuck the outer sides over the corners (remember to remove the strip from the double sided tape before you do this. It should look like this...

Next I decorated the lid by putting a length of Regal Rose around the edge of the box and tying in a knot. The paper is nicely patterned so I didn't feel it needed too much decoration. I then made a little to and from label to go on the box and tied it through the knot of the ribbon with Stampin' Up! Gold Elastic.

A very thoughtful present for someone as they can then use them to send out their Thank You Notes after Christmas.

Will be back tomorrow with the last of the 12 Gifts of Christmas....

Have a good evening all xx


12 Gifts of Christmas - Day 3

Today's is a simple one as long as you can get the template right, I will post a picture of a template and you can print it at any size you like to make different sizes.... of what you ask?? Well today we are going to make a....

Pillow Box

So I will just tell you that this was really easy for me as I cut out the Pillow Box on my cricut expression, so that made life so much easier, but I will include a template for those of you who have to cut by hand. You can also download a PDF file from here... The black lines are where you cut and the red dotted lines need to be scored.

Here is the cut out pillow box, it is a bit hard to see as it is see through..


Next you need to fold along all the lines and then add a bit of the double sided tape to the edge piece so that we can stick it together as shown here...

It is a bit tricky to line it up properly as the acetate has a mind of its own, but stick together with the flap on the inside, then make sure you run your fingers along the flap on the inside so that it has stuck together properly. It should then look like this.

Fold the flaps in at one end, I stuck a small amount of double sided sticky tape to one end to make sure it didn't come open, and then decorate. I did this very simply using the I Wish Simply Scrappin Kit where there are lengths of sticky patterned Paper, I then cut a scallop circle, and matted it with a 1 3/8" circle and then stuck the 1 1/4" circle on that which I had decorated.

I then filled one with Smarties (hence the sticking one end, would be a tragedy if they all fell out) and put twilight mints in the other.

These are ideal for putting on the branches of your Christmas Tree incase someone turns up who you haven't bought a present for, you can just hand one of these out, or to give out in your office. You could put a mini first aid kit in one or a sewing kit, the ideas are endless.

I will be back with Day 4 tomorrow...

I just wanted to show you a card I put together really quickly yesterday as my neighbour wanted it for her daughters 26th birthday, I didn't use all Stampin' Up! stash as my other stash is feeling a bit neglected lately, but I cannot stay away from this awesome Stamp Set...


the patterned paper is Basic Grey Sugared, the lace punch is a Martha Stewart punch, the pink ribbon is actually velvet although you cannot see that from this photograph, and the A Rose is A Rose Stamp Set was stamped using Rose Red and Bravo Burgundy Ink Pads, the leaves were Sage Shadow and Old Olive, I used glamour dust on the rose, it isn't really as glittery as it looks in the photo, it is more of an irridescent glitter, but the flash on the camera made it all sparkle. The Sentiment is from the Fast Notes Stamp Set and I cut it out using the scallop punch, I fitted the sentiment into a scallop on either side and cut out, I then used a ruler from one side of the scallop to the other and cut with a craft knife, I then did the same below the sentiment, see no need for the US's Word Window that we so desperately wanted...